As any parent or caregiver knows, children’s artwork can quickly accumulate into piles of colorful drawings, paintings, and crafts. While these creations are treasures that capture creativity and growth, they can also lead to clutter and disorganization in your home. Finding ways to organize kids’ art not only keeps your space tidy but also helps preserve those precious memories in an accessible and enjoyable way.
Here are some helpful tips and strategies to keep your kids’ art organized without losing track of their unique and special pieces.
Why Organizing Kids’ Art Matters
Before diving into the tips, it’s important to understand why organization is valuable:
– Preserves Memories: Organized artwork makes it easier to look back on your child’s progress and creativity over time.
– Reduces Clutter: Helps prevent piles of paper and crafts from taking over your home.
– Encourages Creativity: An orderly space can inspire more creativity and pride in your child’s work.
– Simplifies Decision Making: Knowing what you have helps in deciding what to keep, display, or let go.
Step 1: Set Up a Dedicated Art Space
Creating a specific area for your child’s art supplies and finished pieces can reduce mess and encourage organization.
– Choose a spot: This could be a corner of a room, a shelf, or a portable cart.
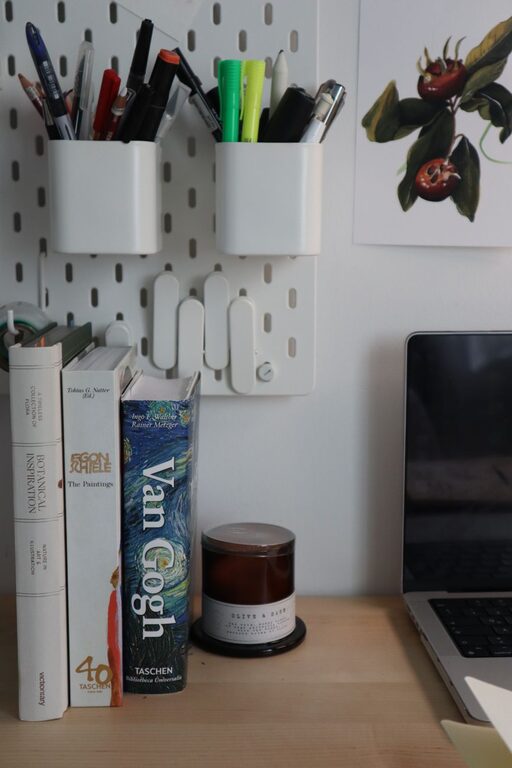
– Use containers: Clear bins, jars, or drawer organizers help keep supplies like crayons, markers, and glue in order.
– Establish a routine: Teach your child to put away supplies after use and place their finished art in a designated spot.
Step 2: Display Artwork Creatively
Showcasing artwork gives your child a sense of pride and helps keep pieces from piling up unseen.
– Rotating gallery: Use a bulletin board, string with clothespins, or magnetic strips to display current favorites and swap them out regularly.
– Frames and clipboards: Hang a few frames or clipboards where you can easily change the displayed art.
– Digital photo frame: Capture photos of artwork and display them in a digital frame that cycles through the images.
Step 3: Sort and Categorize
Consistent sorting makes organizing manageable and avoids overwhelming stacks.
– Sort by type: Separate paintings, drawings, crafts, and three-dimensional projects.
– Sort by date or grade: Use folders or binders labeled by school year or age.
– Regular review: Set aside time monthly or quarterly to go through new artwork with your child.
Step 4: Store Artwork Efficiently
Once sorted, storing the art properly helps keep it safe and easy to find.
– Binders with plastic sleeves: Great for flat artwork like drawings and small paintings.
– Portfolio folders: Large flat folders protect oversized pieces.
– Storage boxes: Use labeled archival boxes for three-dimensional art and bulkier projects.
– Digital backup: Scan or photograph artwork to keep a digital archive that doesn’t take up physical space.
Step 5: Utilize Art in Everyday Life
Repurposing artwork can give it new life and prevent clutter.
– Greeting cards: Use kid’s drawings as personalized cards for family and friends.
– Gift wrap: Larger paintings or drawings can be used as unique wrapping paper.
– DIY projects: Turn artwork into bookmarks, magnets, or collages.
– Photo books: Create printed photo books featuring scanned images of art pieces—these make excellent keepsakes.
Step 6: Know When to Let Go
It’s understandable to want to save every piece, but letting go is part of staying organized.
– Involve your child: Let them choose their favorite pieces to keep.
– Keep the best: Focus on artwork that showcases milestones or meaningful memories.
– Recycle or repurpose: Use older or less significant art for craft material or discard it respectfully.
Tips for Maintaining Organization Long-Term
– Set limits: Decide on a specific amount of space for storing artwork to prevent overflow.
– Regular check-ins: Revisit your system every few months to adjust as needed.
– Celebrate achievements: Display new artwork proudly to motivate your child.
– Be flexible: Adapt storage and display methods as your child grows and their art style changes.
—
Organizing your kids’ art is an ongoing process but with these practical steps, it can be enjoyable and rewarding. By creating dedicated spaces, displaying and storing artwork thoughtfully, and regularly sorting through creations, you’ll honor your child’s creativity while keeping your home neat and cheerful. Happy organizing!